 Today it's my turn to share a tutorial with you for Bugaboo Stamps, you can see my final product on the Catch the Bug Challenge Blog! So are we ready to see what we are learning to make today? So for today I am sharing how to make a seed packet! I made one through my LSS and I had such a blast I just had to share it with all of you!
Materials:
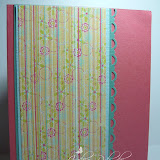
1 - 4 1/4" x 11" sheet of solid card stock
2 - 3 3/8" x 4 1/2" pieces of coordinating card stock
2- 3 1/4" x 4 1/8" pieces card stock
2- 3 1/8" x 4" pieces of designer paper
1- 3 3/8" x 1" pieces of card stock
Corner Rounder
Bone Folder
Cutter or Scor-Pal
Double Sided Tape
Scissors
Velcro
 First gather your supplies! Be sure to pick colors that work well together as well as a matching image. For my project today I picked the Flamingo - Watering digi.
 Turn the card stock on it's shortest side and score the card stock at 3/8" on both sides. Then turn the card stock base on it's long side and score at 1", 1 1/3", 5 7/8", 6 1/4".
 Cut the slits so that the card stock looks as shown, you are cutting the 1/3" x 1 1/3" off of both sides from the top and cutting the slits where the other 1/3" measurements are.
 Use a corner rounder to round the top corners for the card stock.
 Fold all scores and reinforce them and begin shaping the packet.
 Place Sticky Strip along one strip on both sides of the card stock.
 Remove the cover paper on the sticky strip and fold the packet in on itself. You can also cut a slit at the top with a circle punch, or leave it. Add card stock layers to complete the seed packet look.
 Complete project as desired!
I do hope that you enjoyed my tutorial today, and please let me know if you have any questions! These are super fun and easy to make! Have a great day and thank you for stopping by!
Stamps: Flamingo - Water Flower from Bugaboo Stamps; Paper: Whisper White, Simply Chartruce, Rich Razzelberry, My Mind's Eye Happy Go Lucky DP; Ink: Rv13 Tender Pink, R00 Pinkish White, RV17 Deep Magenta, RV19 Red Violet, C1 Cool Gray No. 1, N5 Neutral Gray No. 5, B00 Frost Blue, YG23 New Leaf, G14 Apple Green; Accessories: Sticky Strip, Corner Rounder, Self Adhesive Rhinestones


8 comments:
Thank you so much for the tutorial. Yours turned out so adorable and I love the image and the colors you picked for this project. So bright and cheerful. Hope you have a wonderful day.
Shannin
This is super cute Jackie! Love the tutorial (and your project too!)
Hugs & Happy Days!
~Min
Cute! Thanks for the step by step directions. :)
This is so neat. Thanks so much for sharing.
What an adorable way to give a little give of seeds or anything that's slim. Great idea and easy tutorial to follow.
Great tutorial, Jackie! This is fabulous!!!!
This is a great idea and a wonderful tutorial! Thanks so much for SHARING!! :)
Oh this is a wonderful tutorial. I actually do give out seeds come fall and this would make for a beautiful presentation!
Post a Comment